This article reviews the basics of creating your Calendly account. Let's get started!
Create an account
-
Head to calendly.com & click "Get Started" to sign up using your email
- If using a Gmail account, we recommend logging in with Google (this will save a step in the calendar integration later)

Initial Setup
Step 1: Create your Calendly URL

Step 2: Connect your Calendar

Step 3: Set your availability
- You can further customize your availability later on

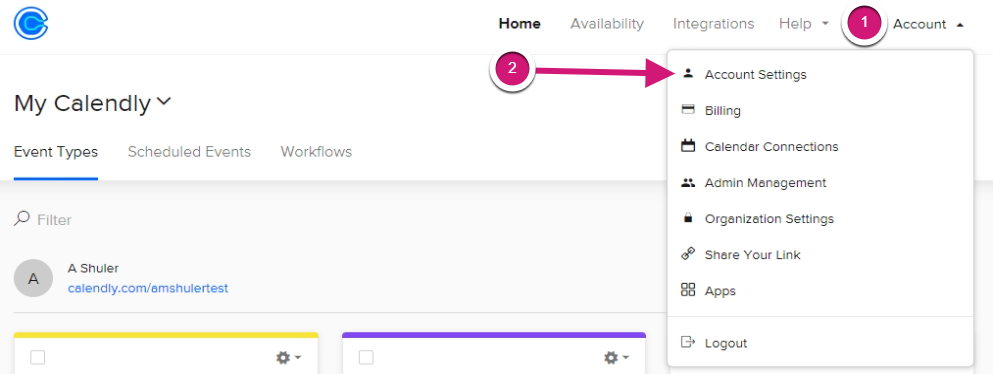
Step 4: Go into Account Settings

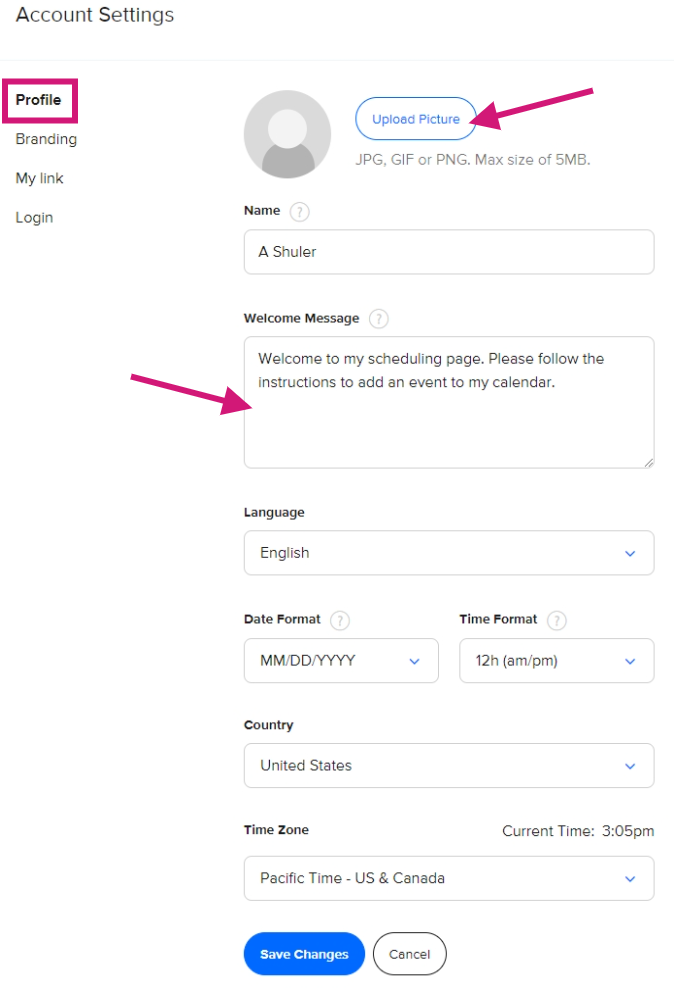
Step 5: Add picture & welcome message

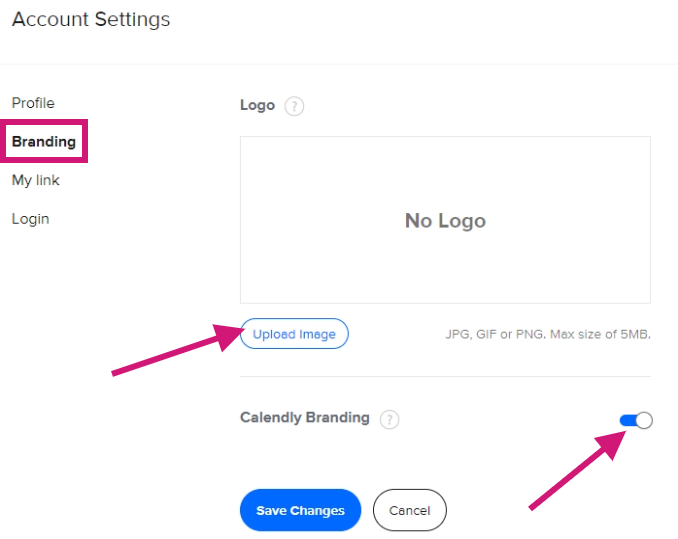
Step 6: Add logo & turn off Calendly branding

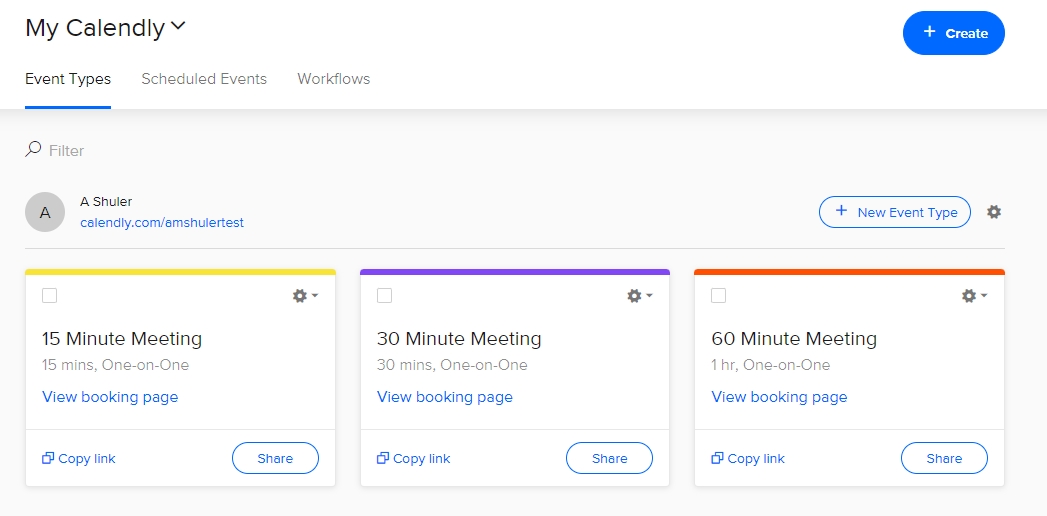
Congratulations! Your Calendly account is now set up.

Check out the articles below to set up Zoom integration, create events & more.
Other Resources
- Edit Event Name
- Editing URL
- Customize Email & Text Message Reminders
- Cancel or Reschedule an Appointment
- Calendly Pricing Page
- Calendly for Chrome
- Calendly Mobile App
If you need additional help:
Please contact your Support team:
We are happy to help :)
support@byreferralonly.com
800-950-7325 Ex 3401

Comments
0 comments
Please sign in to leave a comment.