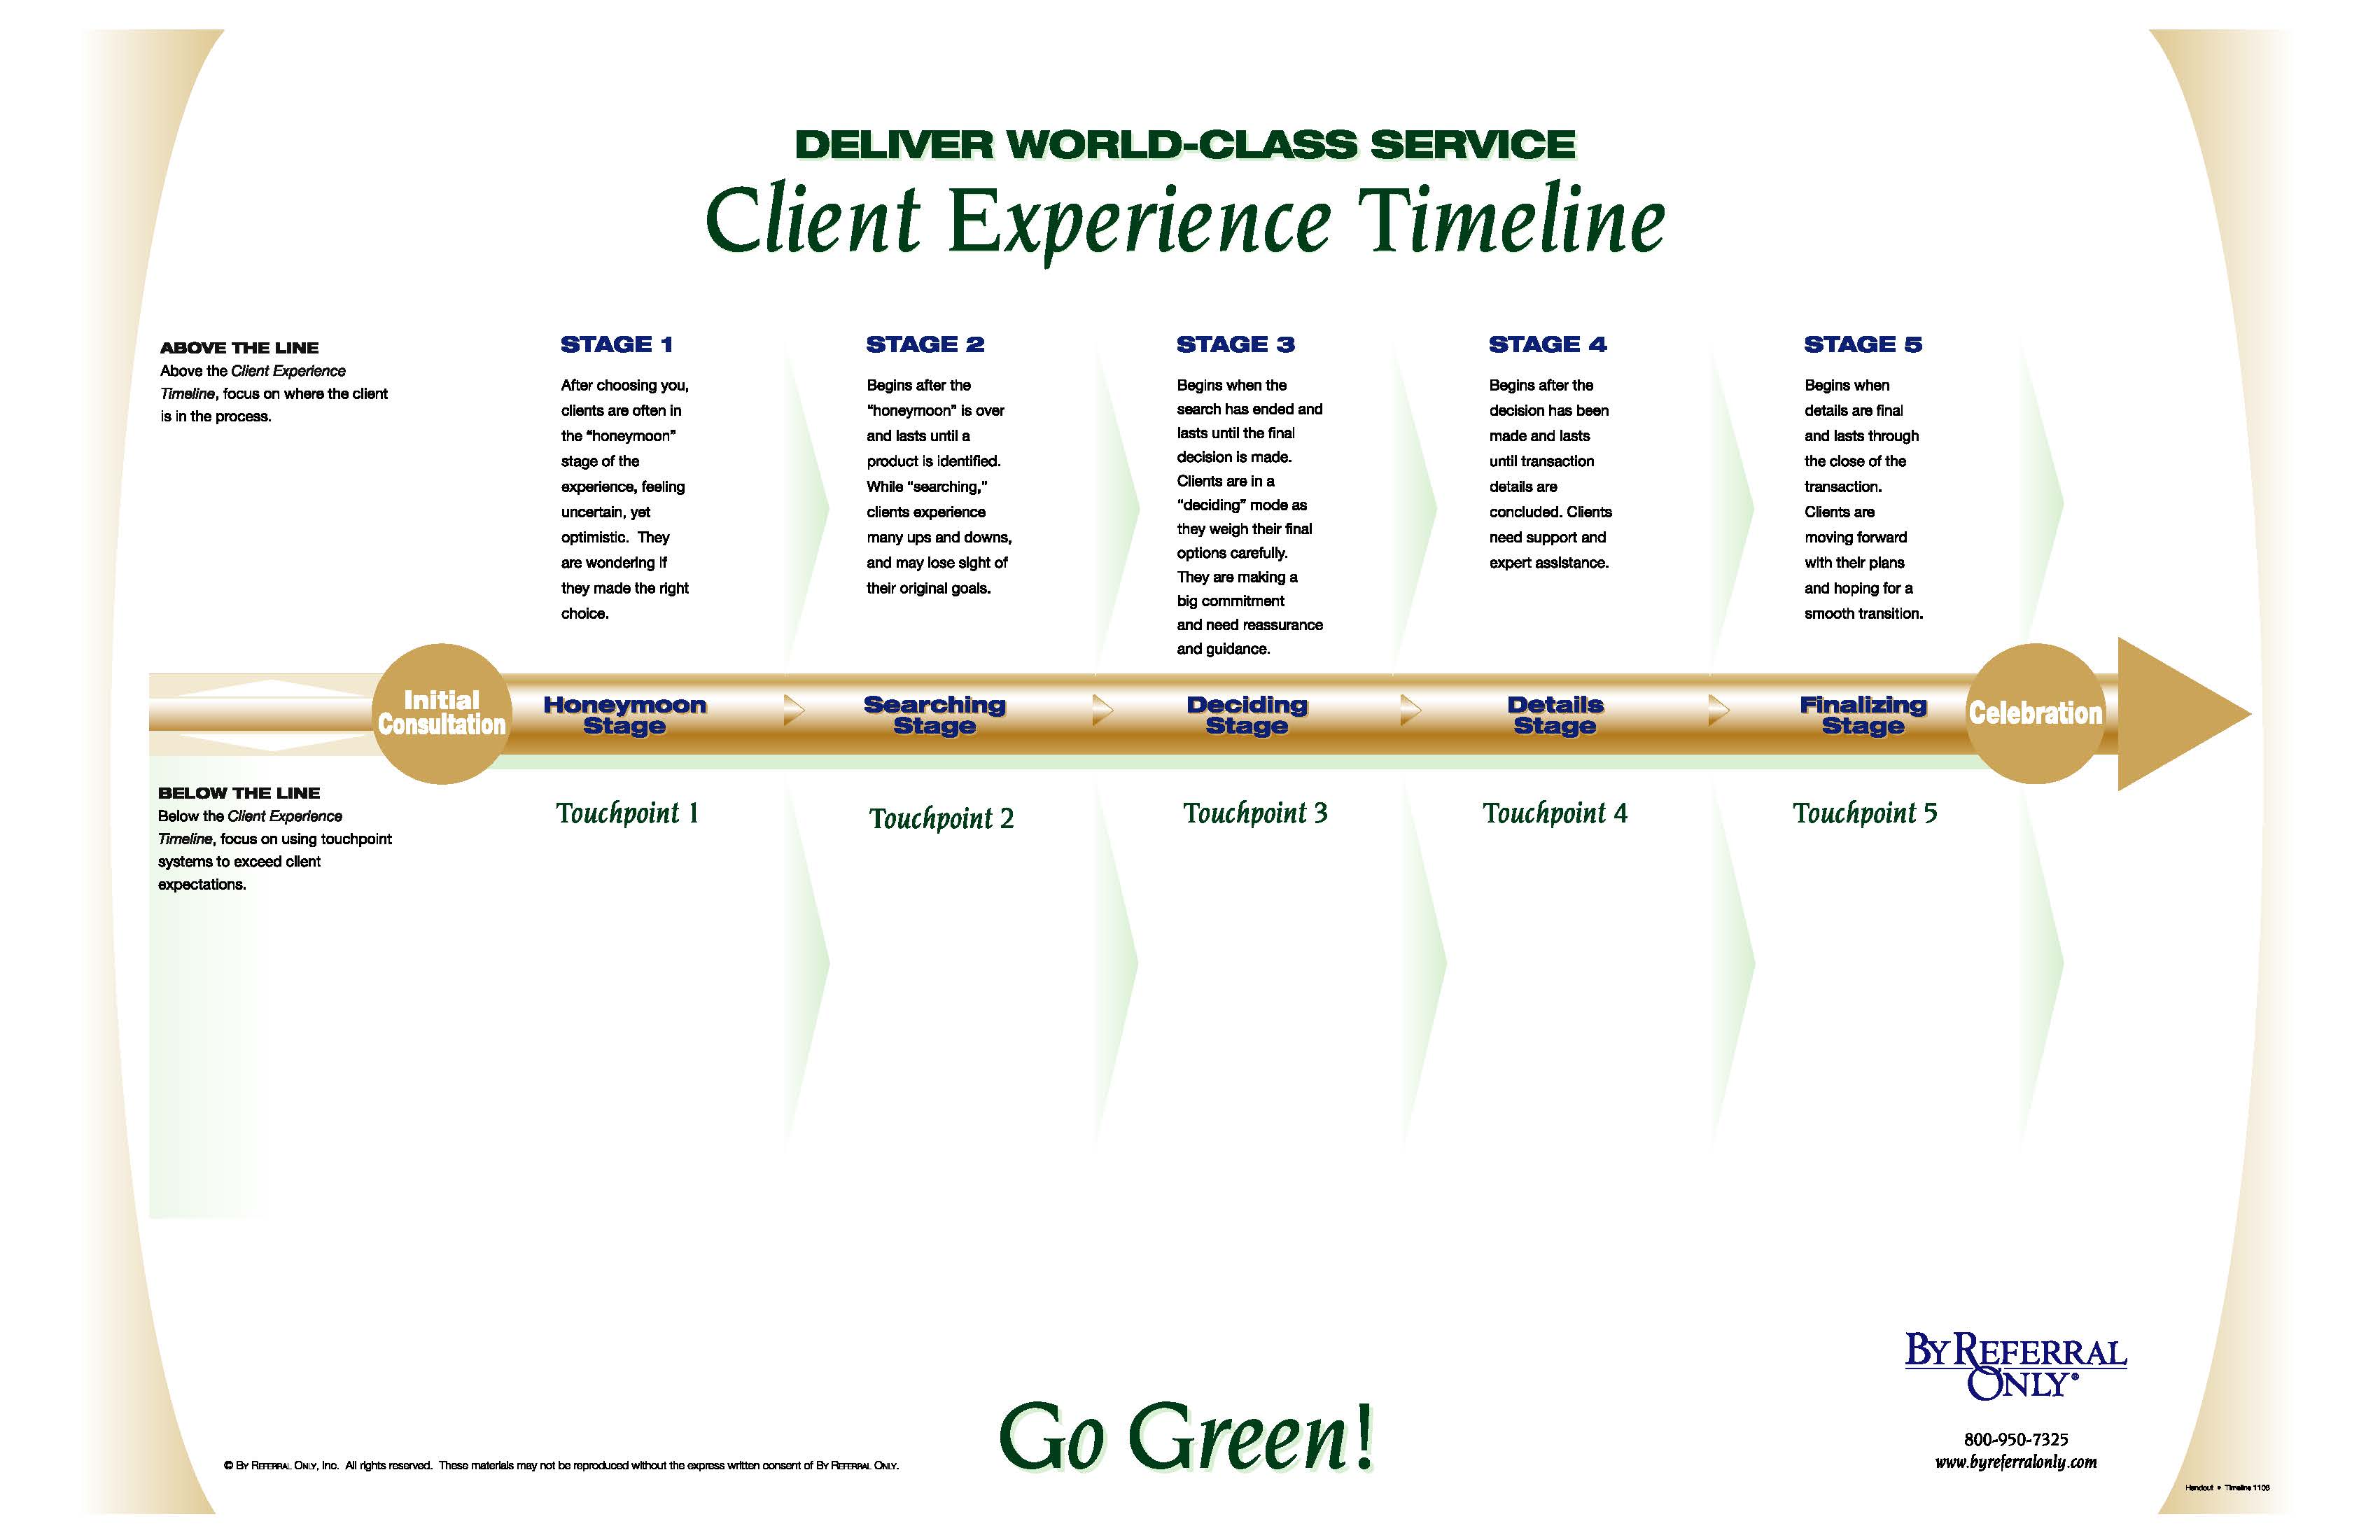
Implementing The Client Experience Timeline

Link to download the image above: click here
PURPOSE
To identify the client's progress through each stage of the transaction process, so you know
- Which touchpoint to use and when to use it.
- When to ask for referrals.
BENEFITS
- Reminds you of your goal to generate a 50% referral rate with your current clients.
- Encourages you to ask for referrals.
- Acts as a reminder of your organized, efficient business systems.
STEPS TO SUCCESS
The best way to learn and implement this strategy is to review the information twice:
- First to understand the overall process.
- Then to follow the instructions step by step.
Getting Ready
- Schedule time to learn and implement the Client Experience Timeline strategy.
- Review the Turnkey Touchpoint Program (see Other Resources).
- Laminate a copy of the By Referral Only Client Experience Timeline. An 11 x 17 version of The Client Experience Timeline is available in Other Resources.
- Post the Client Experience Timeline.
Implementing
- Purchase a supply of yellow and green Post-it Notes.
- Write the name of each of your current clients on a yellow Post-it Note. A current client is someone who has:
- Gone through the Initial Consultation.
- Signed your listing form, buyer's agency agreement, or loan application.
- Place each client's Post-it Note on the wall chart in one of the seven stages that reflects where they are in the transaction.
- As clients move from one stage to the next, move their Post-it Note accordingly.
- Implement the touchpoint(s) that corresponds to that stage of the timeline.
- When clients give you a referral, replace their yellow Post-it Note with a green one. You can quickly see the effectiveness of your touchpoint system in generating referrals by the number of green (vs. yellow) Post-it Notes.
Following Up
Update your Client Experience Timeline to reflect your clients' current status
Tracking
Track your results.
TIPS AND CAUTIONS
- As you identify potential clients, write their name on a yellow Post-it Note and place it in the upper left-hand corner of your chart. When a transaction closes, move the Post-it Note to the upper right-hand corner.
- When a client refers someone to you, write the referrer's name on the Post-it Note of your new potential client to help you remember to track the referral source.
- Personalize your Client Experience Timeline by putting pictures of your clients and their referrals on the chart. This will also help your office staff associate names with faces.
SUCCESS INDICATORS
You save time because you have a quick reference that shows where all your clients are in the process.
YOUR INVESTMENT
- Laminating the Client Experience Timeline.
- Post-it Notes.
- Photographs of clients (optional).
WANT MORE?
Take advantage of the creativity and experience of other By Referral Only Community members by networking with colleagues at member events and workshops. New ideas from these consultants can enhance your comfort and flexibility with this strategy.

Comments
0 comments
Please sign in to leave a comment.